BMS and Azure: SAML 2.0 single sign-on (SSO) and Just-in-Time (JIT) provisioning
Azure setup
Prerequisites
- You should have an active Azure (https://portal.azure.com) account.
- In order to set up BMS with Azure, you need to add it as a new enterprise application.
Adding a new application
- Log into (https://portal.azure.com).
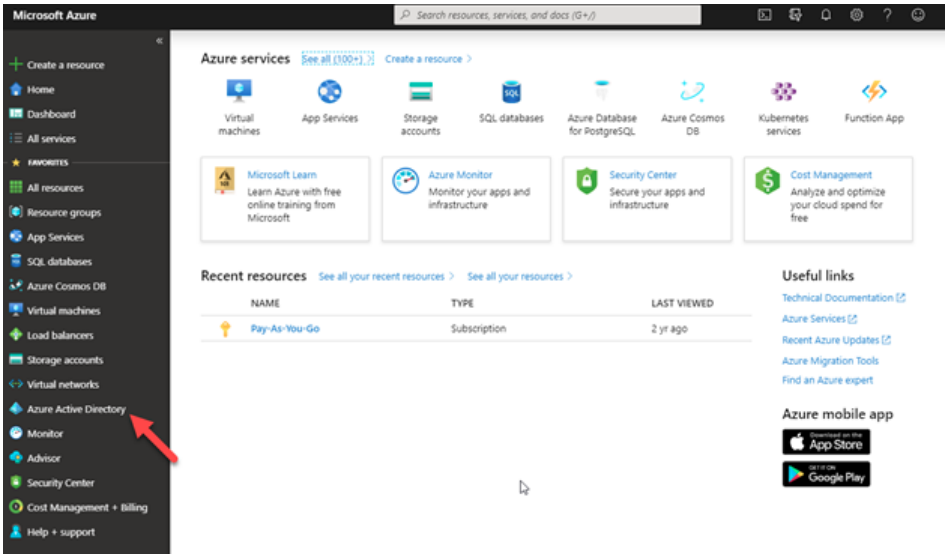
- On the left panel, select Azure Active Directory.
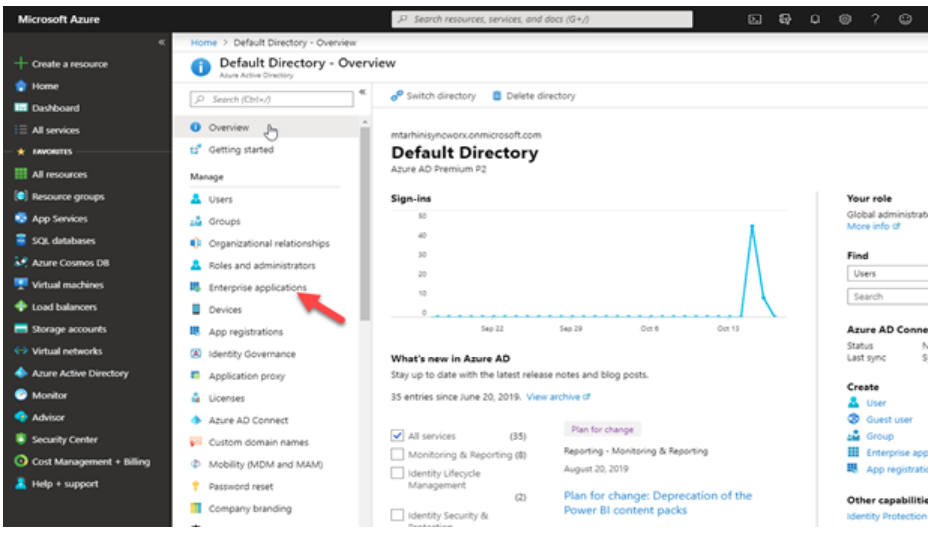
- Select Enterprise applications.
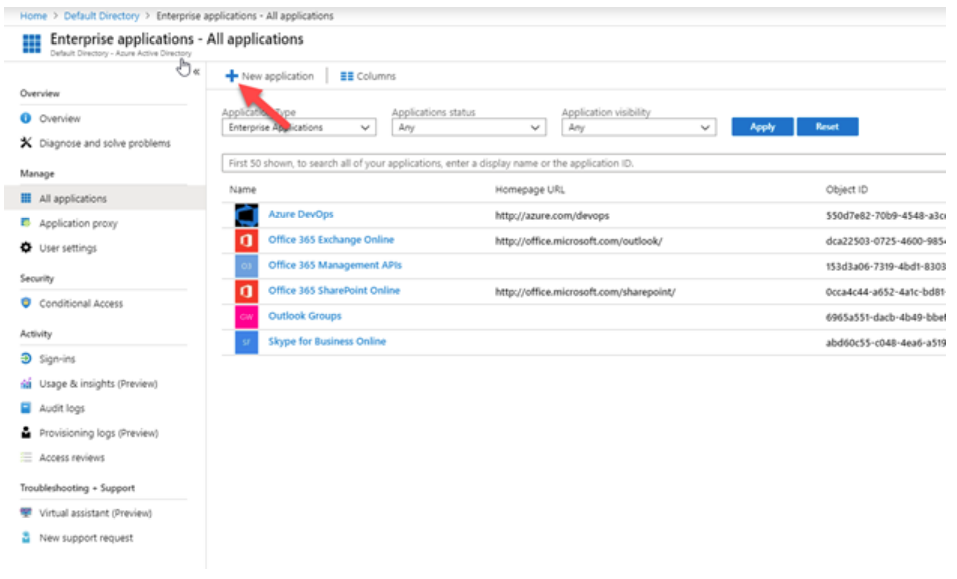
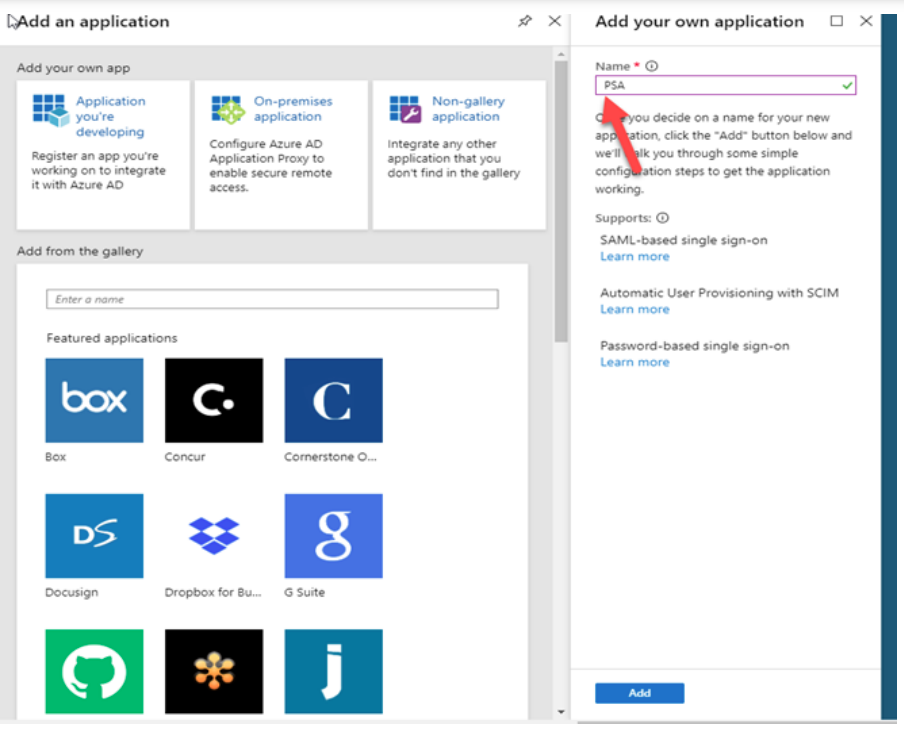
- Click New application.
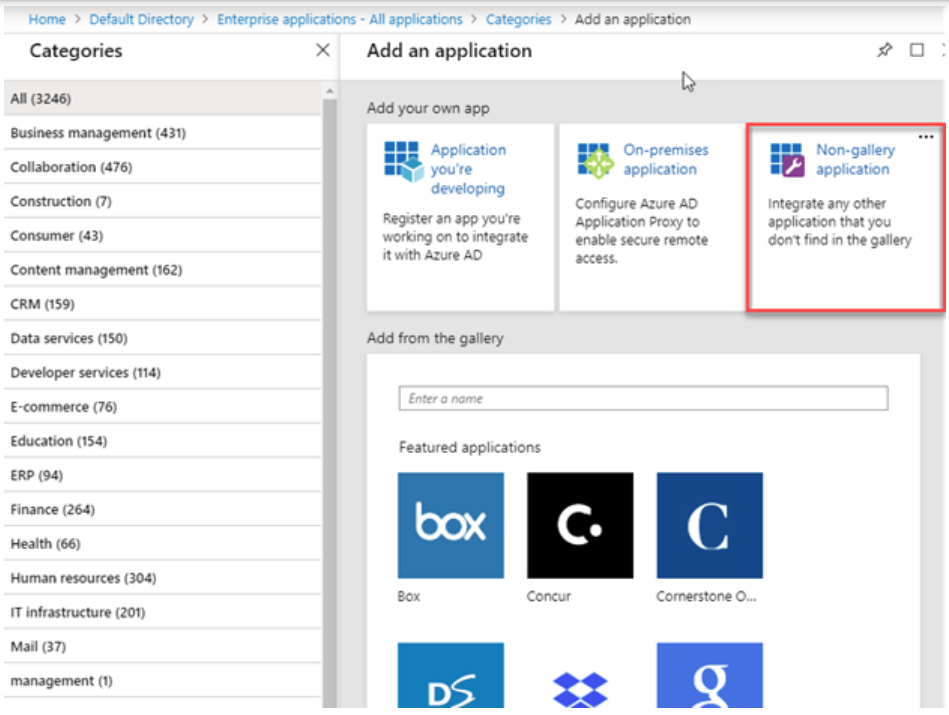
- Select Non-gallery application.
- Provide a name to your new application and then click Add.
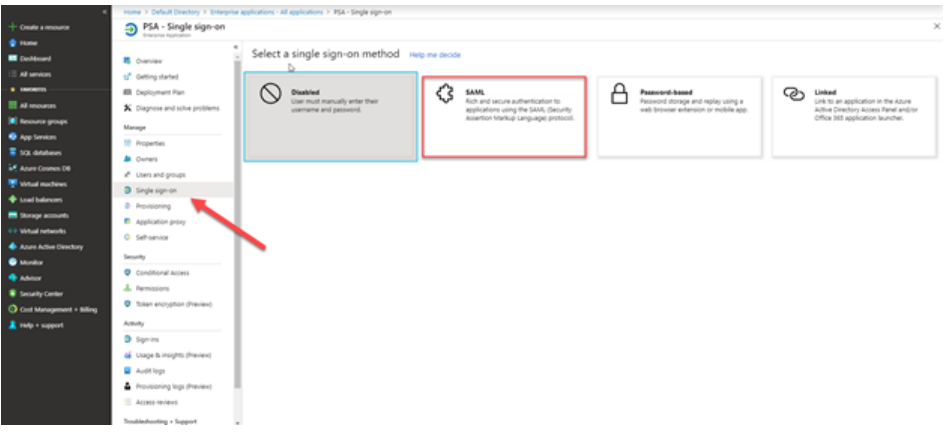
- Select Single sign-on in the menu and then select SAML.
- Edit the Basic SAML Configuration box.
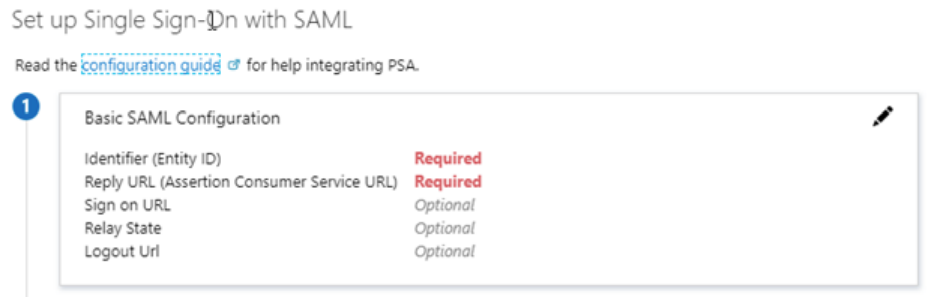
- Enter the following URLs in the fields provided, replacing subdomain with your subdomain:
- Identifier (Entity ID): Enter your BMS domain, e.g. https://bms.kaseya.com
- Reply URL (Assertion Consumer Service URL): Enter https://bms.kaseya.com/SAML/Connect.aspx
- Return to the setup screen.
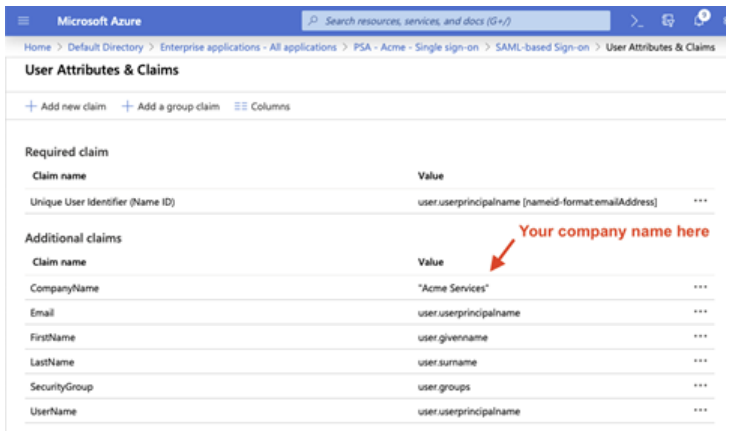
- Modify the User Attributes & Claims box as follows:
- Delete all default additional claims from the list.
- Click Add new claim to add the following claims. (Leave Namespace blank when adding claims.):
- CompanyName > (enter the Company Name as displayed under My Profile in the BMS Web App).
- Email > user.userprincipalname
- FirstName > user.givenname
- LastName > user.surname
- Username > user.userprincipalname
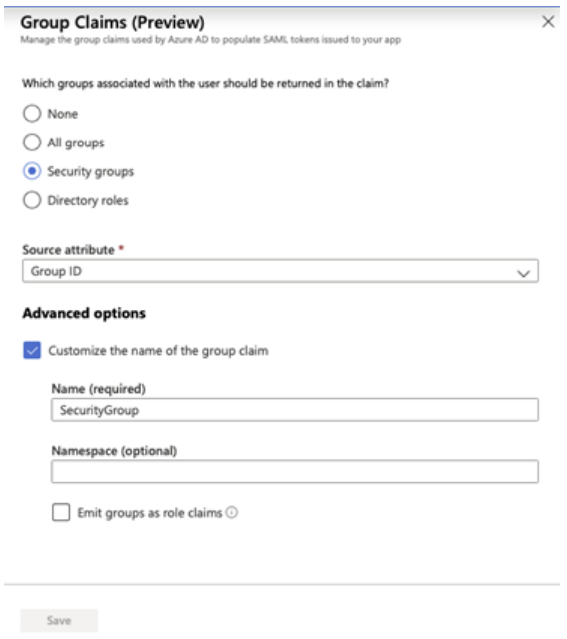
- Click Add a group claim to add a group claim.
- Select Security groups.
- For Source attribute, select Group ID.
- Under Advanced Options, check Customize the name of the group claim then enter SecurityGroup as the name and click Save.
- When complete, the User Attributes & Claims section should look as follows:
- Edit the SAML Signing Certificate box as follows:
- Signing Option – Select Sign SAML response and assertion
- Signing Algorithm – Select SHA-256
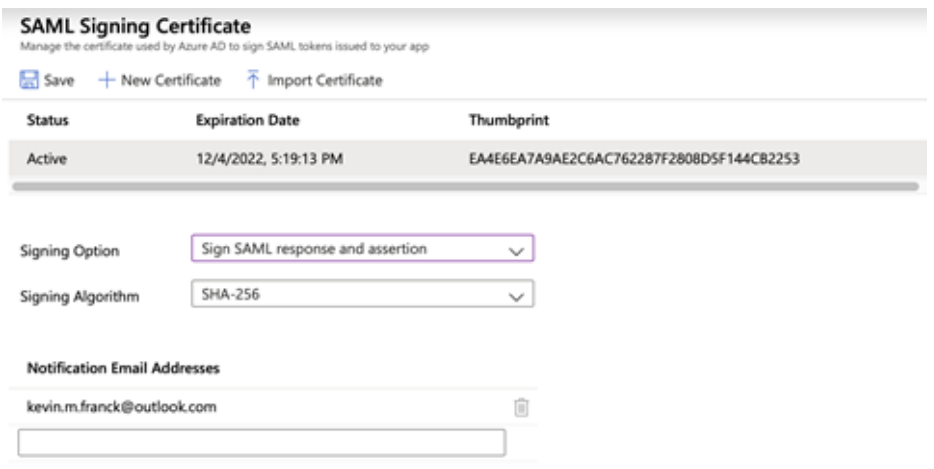
Downloading the certificate
In the setup screen, click the SAML Signing Certificate box, then download the certificate.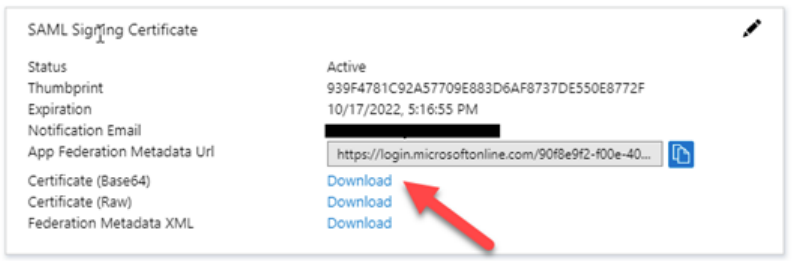
BMS setup
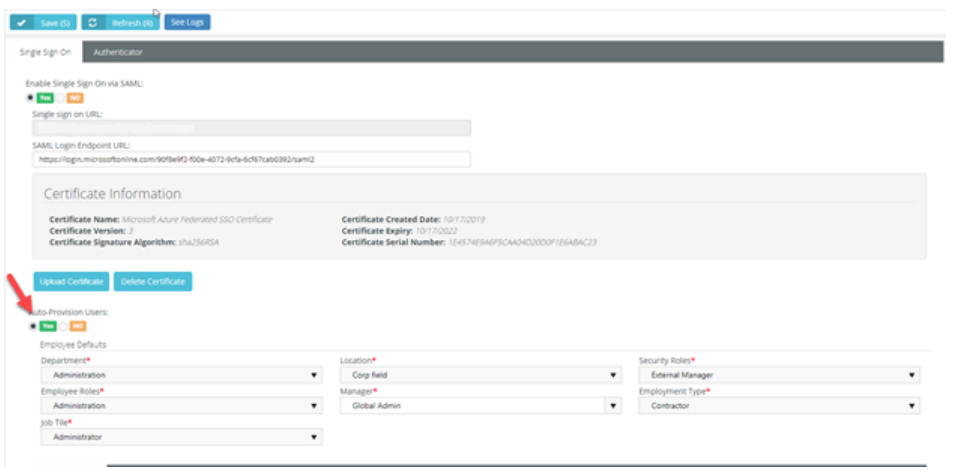
- In BMS you need to set up the system to enable SAML authentication and that can be achieved under Admin > My Company > Authentication.
- In the Single Sign On tab, upload the certificate downloaded previously, and set Enable Single Sign On via SAML to Yes, and then click Save.
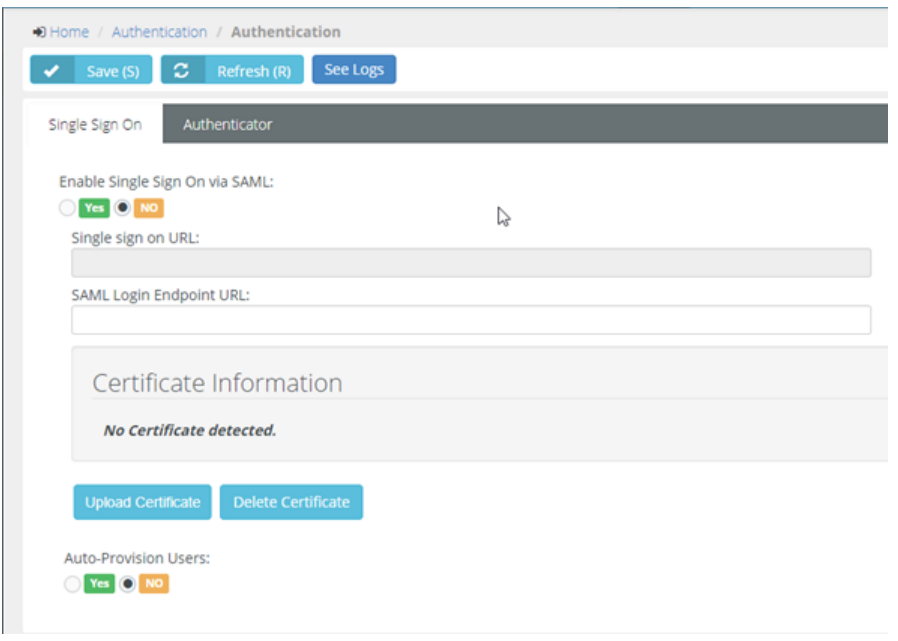
This will enable BMS SAML authentication.
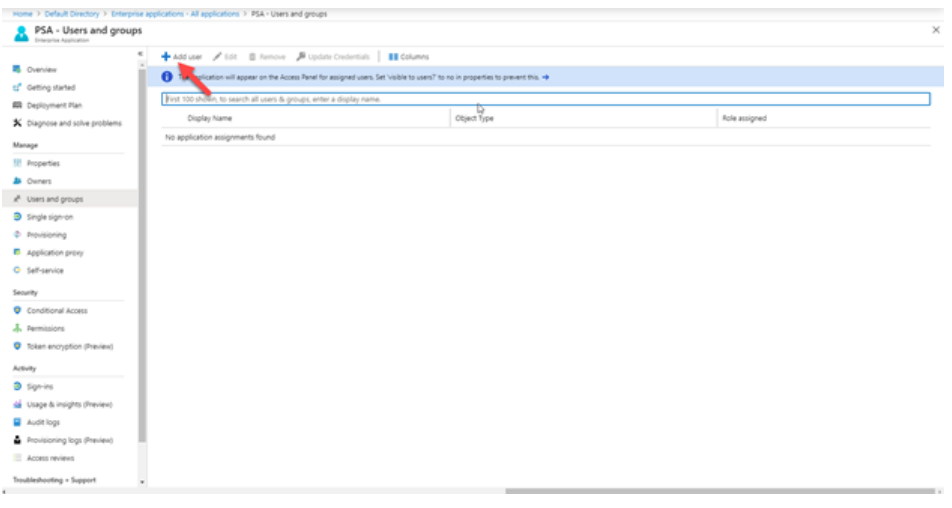
Azure application assignment
Once the application is created, you have to assign users or user groups to this application.
- Select the Users and groups tab in the left-hand menu.
- Click Add user to assign users or user groups to this application.
When a user is assigned, perform the following steps to make sure that SSO is working:
- Log out and close the Azure management portal and the Azure AD access panel.
- In a new browser session, navigate directly to the access panel at http://myapps.microsoft.com.
- Enter your Azure AD credentials to log in. After authentication, you will be able to interact with the applications integrated with the directory.
- Click on the BMS SSO application you created to be redirected and logged into BMS.
Enabling two-way SAML login
- To launch Azure during the login from BMS, you need to enable two-way SAML integration. To do this, you will need your Azure login URL that can be found here:
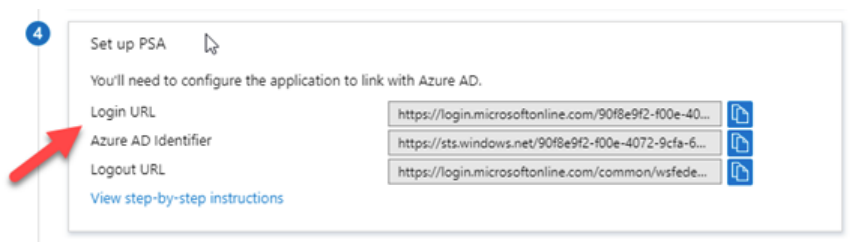
- Once you have this URL, you will need to save it in BMS under the Authentication page:
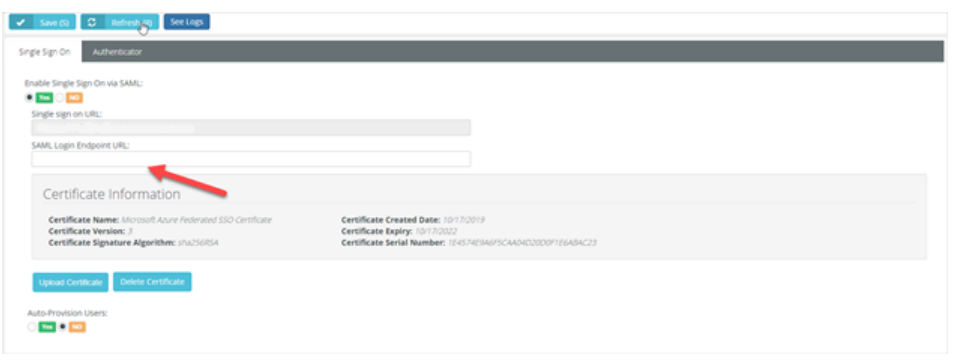
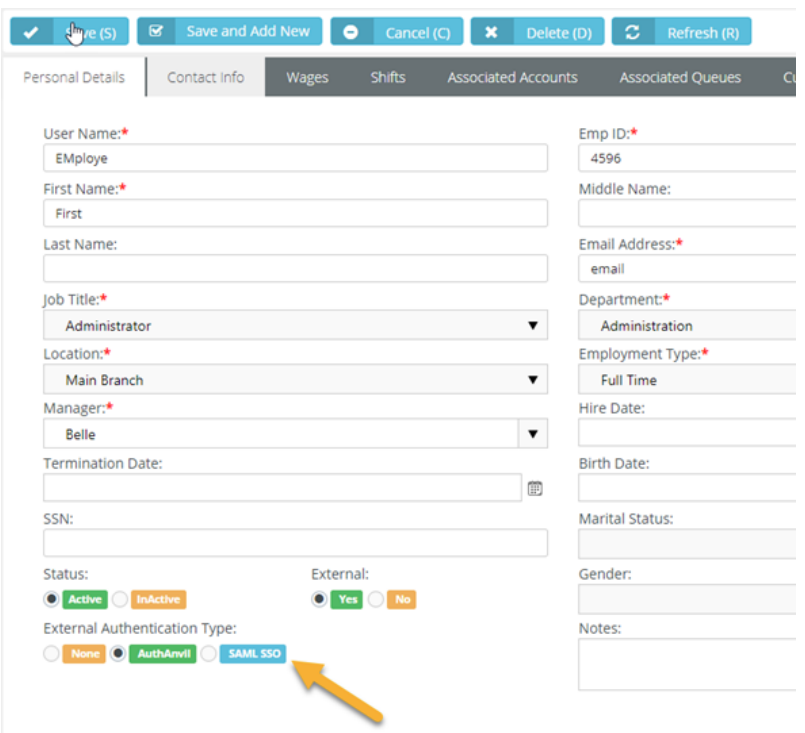
- This will allow you to leverage the Azure login screen when users are trying to log into BMS. You can enable this on the user level by updating the Authentication Type at the Employee level:
Enabling JIT provisioning
- To enable Just-in-Time (JIT) provisioning, you will need to do it from the BMS authentication page.
- By default, all users will take the Default Security Roles specified in the above Employee Defaults section. To start mapping Active Directory Groups to BMS Security Roles, you will need to Add Mapping Rules as following:
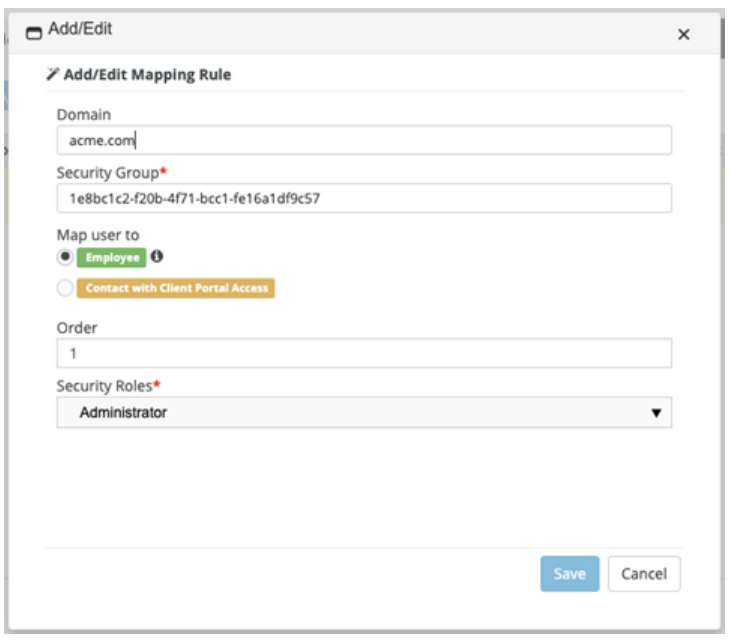
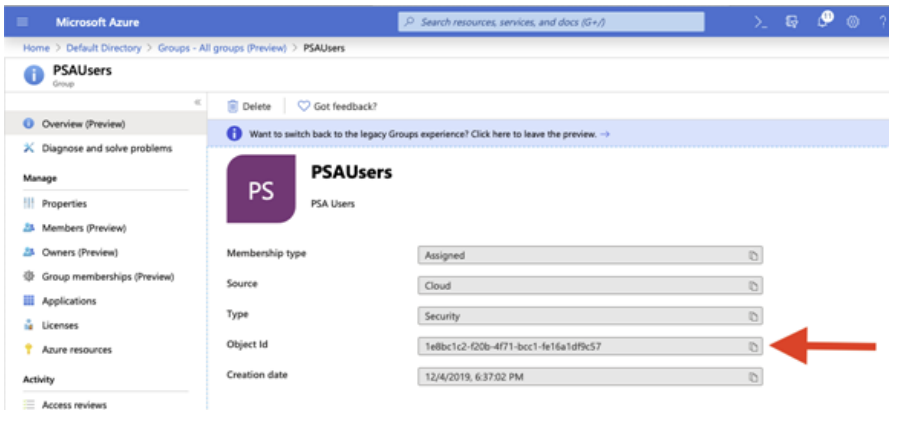
NOTE For security group, you must use the ‘objectId’ value associated with the group in Azure AD.
- By adding multiple rules, you can now start routing Active Directory users to BMS security roles based on domain and security group.


